UniCAVE - Instruction - Use the Nature Pack 3D mode
Create a Unity project with UniCAVE plugin, shows the Natrue Pack 3D model in the CAVE system.
Environment:
- Unity 2019
- UniCAVE 2019
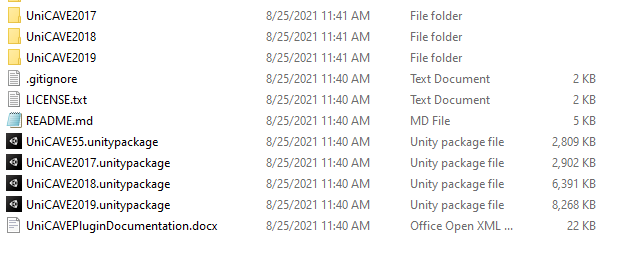
💡 UniCAVE has the version: 55, 2017, 2018, and 2019.
Make sure the Unity version is selected correctly base on what version of UniCAVE are you going to use.
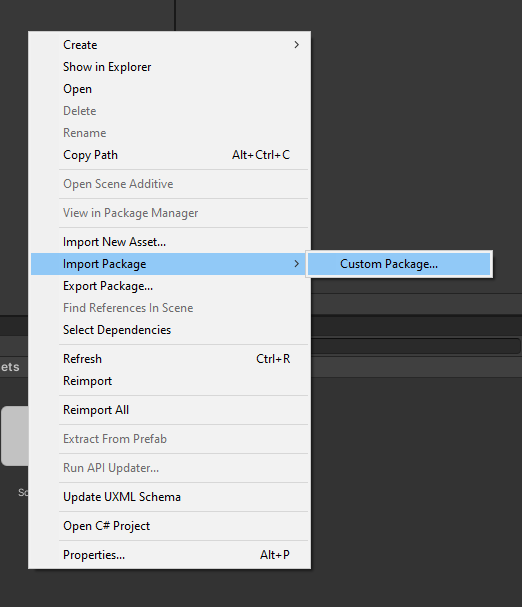
First of all, we need to download UniCAVE package from the link above. And unzip it. In a Unity project, we need to import UniCAVE package via right click the Assets area and select Import Package→CustomPackage…, find the package name: UniCAVE2019.unitypackage
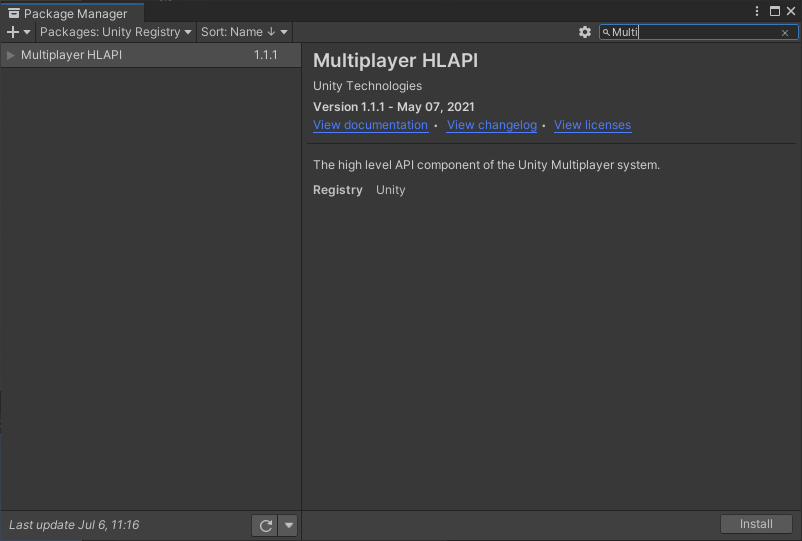
Important: UniCAVE uses the Unity Multiplayer HLAP for local networking. If your project does not use this, it needs to be added to your Unity project in the Unity Package Manager (Window -> Package Manager). To find the Multiplayer HLAPI, you need to select Packages: Unity Registry at the top left of the Package Manager.
Project Setup
Add VR Support
Go to Edit → Project Settings → Player
Under XR Settings enable Virtual Reality Supported
Add Stereo Display (non head-mounted) to SDK by click “+” under Virtual Reality SDKs
Remove other SDKs

Import package
Go to Package→UniCAVE→Prefabs, drag and drop Default Network Manager to the scene.
Import the prefab file below
M4_Seq_4Displays_1PC_mosaic_crop.prefab
Now, the Hierarchy is like:

Setup: Display, Head, Wand, Input Setup
lets setup Display, Create
Physical Display Managerand set machine Name as the “VISCUBE”. Associated Displays will be setup automatically once the different displays setup.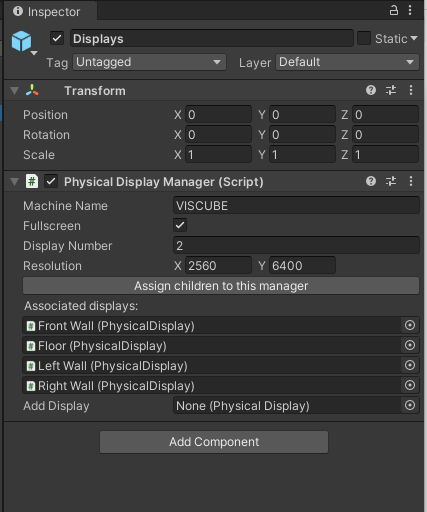
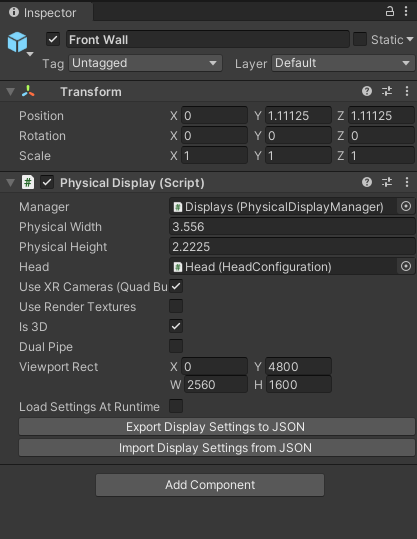
go to Front Wall’s Inspector
Add Component
Physical Displayand select Manager asDisplaysFor other values, we can import them from JSON files.
Do the same thing for
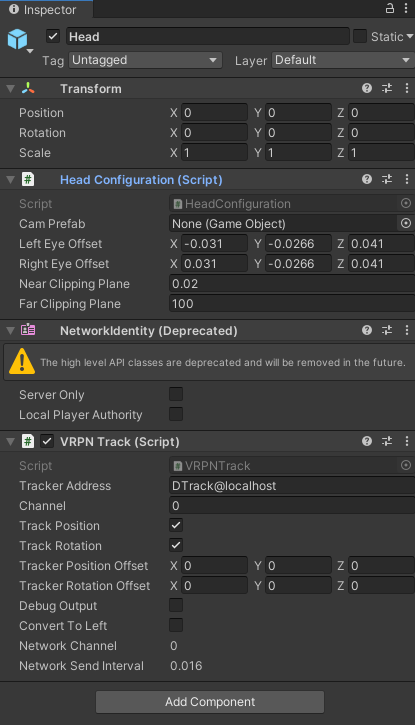
Floor,Left Wall, andRight WallGo to Head, and set the values as the image below.
Go to Wand
Remove the empty script (otherwise, it may cause the frozen.)
Add a new component
VRPN Trackand changeTracker Addressto “DTrack@localhost” which is same as the TrackerAddress in Head’s setting and setChannel=1.Go to Input, remove empty script, create
VRPN Input, and set as below. Make sure TrackerAddress is same as previous step. and Top Level UniCAVE is the prefab that imported. We can change theMovement Speedto 0.5 which makes the movement with a comfortable speed. Also Dead Zone needs to be changed from 0.05 to 0.5 as well, because small value cause too sensitive when try to turn. For other features, feel free to change.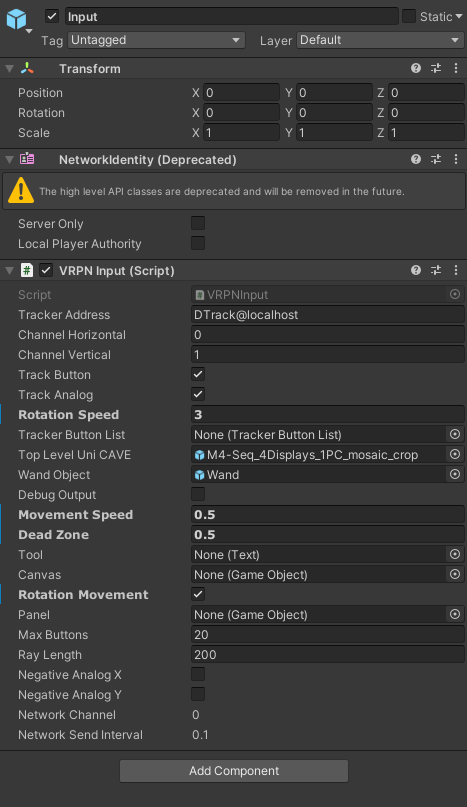
Go to
Default Network Manager, and addNetwork Initialization. Remember to changeServer Addressto theEthernet adapter LAN’s IPv4 Addresswhich is 192.168.0.2. We can find the IP address via Windows Command Prompt with command “ipconfig”. Also, need to change the Head Machine to “VISCUBE”.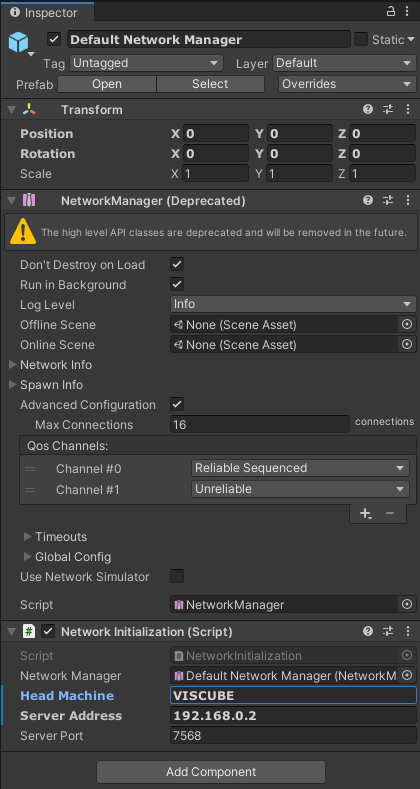
Edit VRPN script
Go to Packages → UniCAVE Plugin → Scripts → VRPN
Edit VRPN.CS file
Replace the following code
1 | |
Build
After setup, go to File → Build Setting…, and build it.
Run the project - CAVE Machine
Turn on the Projector by double click PROJS_ON.sh
Open DTrack2, connect
Turn on
VRPN Server- go to folder on Desktop/visbox/apps/UniCAVE2019
- double click
vrpn_server.exe
Copy the project folder to /UniCAVE2019
Copy the
paul2019_force_gpu.ps1to the project folder1
2
3
4
5
6
7
8# Windows Powershell Launch Script
# Script Generated On Wednesday, April 8, 2020, 3:11:57 PM
# Setup contains 4 displays and 1 display managers
# Display Group: Displays
If ($env:ComputerName -eq 'VISCUBE') {
& '.\Unicave_workflow\Unicave_workflow.exe' -screen-fullscreen 1 -force-device-index 1 -monitor 2 -screen-width 2560 -screen-height 6400 -vrmode stereo -logFile "Unicave_workflow_force_gpu_log.txt"
}Edit the
ps1file- Change the executable file to the unity project exe file.
- Change the name of the log file
Right click
xxx-force-gpu.ps1and selectRun with PowerShell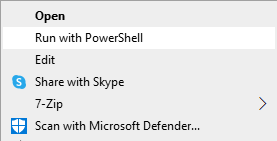
UniCAVE - Instruction - Use the Nature Pack 3D mode